product care
inspired by nature
Your Perioq by SJP clay pot is handcrafted with care — and with a little love, it will reward you with years of wholesome, flavorful cooking. Unlike conventional cookware, clay pots require gentle handling and regular care to preserve their natural beauty and integrity.
Here, you will find simple, time-tested guidelines for preparing, using, and maintaining your clay cookware. Following these steps will ensure that every meal you cook is not only delicious and nutritious but also a tribute to the rich tradition of clay cooking.
how to season a clay pot
Step 1
Clean the Clay Pot
- Rinse the clay pot and lid under running water.
- Use a soft brush or sponge to gently scrub away dust or clay particles.
- Do not use soap or detergent; just rinse it thoroughly with plain water.
Step 2
Soak the Clay Pot
- Submerge the clay pot and lid completely in water.
- Let it soak for 12-24 hours: This allows the clay to absorb water, reducing brittleness and preparing it for heat exposure.
- After soaking, remove the pot and lid and pat dry gently.
Step 3
Scrub and Clean
- Use a soft scrubber to clean the clay pot gently.
- Do not use soap or detergent; just rinse it thoroughly with plain water.
- Wipe off excess water but allow it to remain slightly damp.
Step 4
Apply Oil
- Coat the inner surface of the clay pot with a thin layer of edible oil. (Sesame oil or coconut oil is highly recommended for seasoning).
- Apply the oil evenly on the inside walls, base, and lid of the pot.
- Allow the pot to rest for 2-4 hours so the oil can be absorbed into the clay.
Step 5
Boil Rice Starch Water
- Fill the clay pot with rice starch water (the water used to rinse or boil rice). .Alternatively, you can use plain water with a few spoons of cooked rice in it.
- Place the pot on low heat. Gradually increase the heat to medium and let the water simmer for 20-30 minutes.
- This step helps seal the pores of the clay pot, strengthening it further.
- After boiling, allow the water to cool down, then discard it.
Step 6
Cool and Wash
- Once the pot cools completely, rinse it gently with plain water.
- Do not scrub harshly or use any cleaning agents.
- Let the pot air dry completely in sunlight or in a well-ventilated area.
Step 7
Store or Use the Claypot
- After the pot is fully dry, it is now ready for use.
- Start by cooking simple, soft dishes like rice or lentils to further cure the pot before moving to heavy or oily dishes.
Optional Step
Roast the Coconut
- Place the clay pot on low heat.
- Add 1 cup of shredded coconut to the pot.
- Stir continuously, ensuring the coconut is evenly distributed across the surface.
- Roast for 10-15 minutes until the coconut turns golden brown.
- The oils from the coconut will seep into the clay, helping to seal its pores.
why perioq?
Say goodbye to cracks and bursts! Our curved base supports thermal expansion, making our pots resilient to high heat-unlike machine-made flat- base pots that may fail over time.
Our exclusive deep-burned clay pots are crafted to last. Strong and durable, they're perfect for everyday cooking and built to stand the test of time.
Designed with practicality in mind, our wide and thick brims and handles ensure a comfortable grip -even when the pot is wet-while extending the life of the pot.
Our artisans go the extra mile, hand-polishing each pot with natural pebbles for a smooth finish. This ensures easy stirring and prevents food from sticking, making every meal a delight to prepare.
product care tips
Seasoning (Initial Use)
Always season new clay pots before first use (see the seasoning guide).
Seasoning fills the pores of the clay, preventing cracks and enhancing durability.
Gentle Cleaning (After Each Use)
Avoid soap or detergent – clay is porous and can absorb these, leaving a residue that affects flavour.
Rinse with warm water. Use a soft sponge or coconut fiber brush to scrub away food particles.
For stubborn residue, soak the pot in warm water for 30 minutes before scrubbing.
Drying Properly
Allow the pot to air dry completely before storing.
Store the lid separately or slightly open to allow air circulation and prevent mold.
If you live in a humid area, dry the pot in sunlight occasionally to remove moisture buildup.
Cooking and Temperature Management
Always cook on low to medium heat.
Avoid sudden temperature changes (e.g., placing a hot pot directly under cold water) – this can cause the clay to crack.
Use a heat diffuser if cooking on a gas stove to distribute heat evenly.
Re-seasoning (Periodic Maintenance)
Re-season the pot by boiling rice water, or by roasting shredded coconut inside the pot every few months.
This process strengthens the clay and prevents chipping.
Avoid Acidic Foods (Initially)
During the first few uses, avoid highly acidic or salty foods (like tamarind, vinegar) as they can erode the clay’s surface.
Gradually introduce these foods after the pot has been well-used and seasoned.
Storage Tips
Store clay pots in a dry, ventilated area.
If stacking multiple pots, place a soft cloth between them to avoid scratches.
If not using the pot for a long time, season it lightly with oil and store it in a dry place.
Dealing With Mold
If mold develops during storage, scrub with baking soda and warm water.
Dry in direct sunlight for several hours to eliminate moisture and mold spores.
Minor Crack Repair
If small cracks appear, boil rice water or starch water inside the pot for 30 minutes.
This helps fill cracks and strengthens the clay.
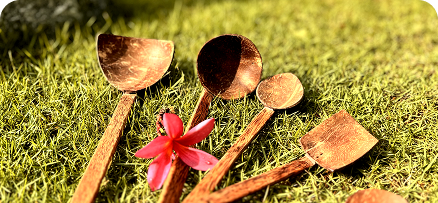
Avoid Using Metal Utensils
Use wooden or silicone utensils to avoid scratching the inner surface.
At Perioq, every pot tells a story, every dish is a celebration, and every choice is a step towards a better tomorrow. Rediscover the magic of authentic cooking with Perioq—crafted for your kitchen, inspired by nature.
